Today we’ll take a turn and showcase a personal project developed by our Tech Lead, Bruno, who took the multiple hours of lockdown we experienced last year and turned them into an initiative that allowed him to communicate with his 6 year old daughter. Below you’ll be able to review his experience and gather all of the details of his project (in case you want to replicate his system).
In terms of social interactions, 2020 was an odd year, with cyclic lockdowns and openings. Keeping in touch with our close ones was one of the main challenges for all of us. The lockdowns are a bizarre experience in itself, but one of the strangest parts for me was when I topped it all up with a fever. It ended up being just a regular flu in the end, but for precaution my doctor ordered me to lock me down in a room for two weeks. Being there just a few meters away from my family and not being able to hug them or have a direct conversation was hard for all of us, but especially for my six-year-old daughter who wasn’t able to wrap her head around the reasons we couldn’t just see each other.
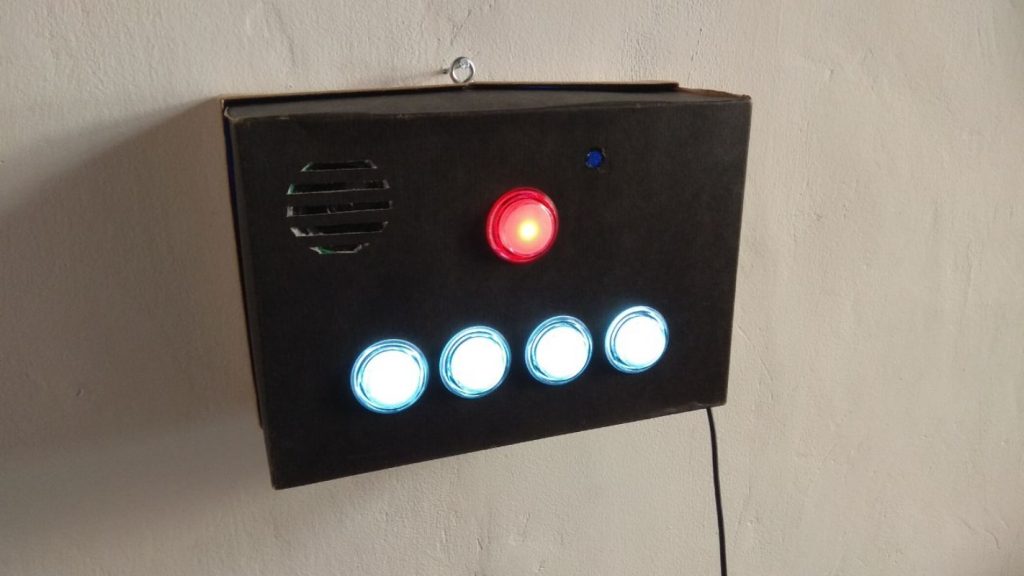
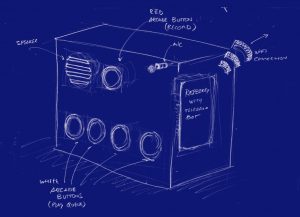
So this time I decided to build something for her to keep us in touch in case something similar happens. The basic concept is a simplified interface for a Telegram voice chat with only a few (big) buttons: it should allow to easily and intuitively send and receive voice messages. Of course having a raspberry-pi as the core of this device was a no-brainer, since It has everything that’s needed for the project: WiFi connectivity, low level interface to control leds and buttons, and of course a complete OS where to run a Python interpreter to control everything.
TUI
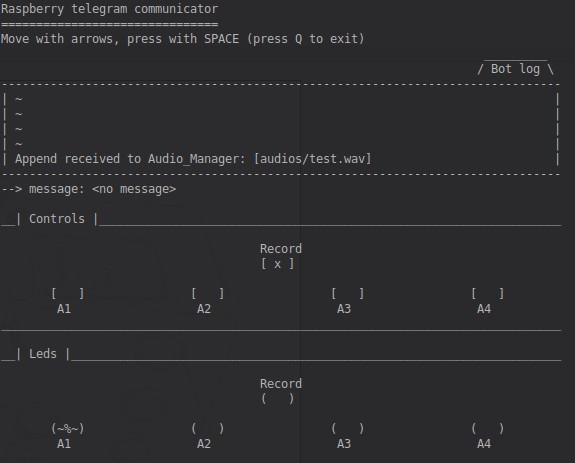
A good idea when dealing with electronic projects is to start small and have a proof of concept working before getting all the components and wire the whole thing together. In this case I started by creating the main program but replacing the physical button interface with a TUI (terminal user interface). The code can be found in this repository, you should be able to test it by running it using the --tui flag like this:
python -m daddy_box --tui
Telegram bot setup
The first time you run it you will need to give it a telegram bot key. Follow this steps to create your instance of a Bot, and then run it with the --setup-bot flag and input the information the BotFather gave you.
You should now be able to search for the bot’s username in telegram and exchange some messages with it. You will first find that you get “not allowed” responses. The idea behind this bot is to exchange messages privately with just one user, so you have to tell the bot which is the allowed user id to interact with.
Take a look at the terminal where the bot is running, you will see some printed messages like this one:
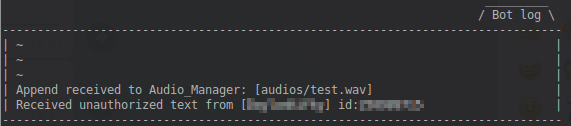
Copy your user-id from there and give it to the bot using the --setup-user flag. You should now be able to send and receive voice messages, so we are ready to start with the physical part of the project.
Raspberry pi HAT
When doing a one-shot project like this I normally use breadboards or perfboards to assemble all the components. I used that approach a bunch of times in the past to handle a few backlitghted buttons, and the process was always frustrating: I ended up spending lots of time with the soldering and wiring of the components. So this time I decided to actually do what I promised myself each one of those times: design a breakout HAT for the raspberry with screw terminals where to easily connect everything.
Since I was at it I added a darlington array and a number of selectable power sources in order to potentially handle bigger loads. I designed it in Kicad and then ordered a few PCBs. You can find the project files here.

Audio
One little detail I wasn’t taking into consideration when I started the project was the fact that a raspberry pi doesn’t have an audio input. So I had to buy an USB microphone. A cheap one from a local store did the trick. I removed all the plastic parts and shortened the cable to avoid unnecessary EM interference.
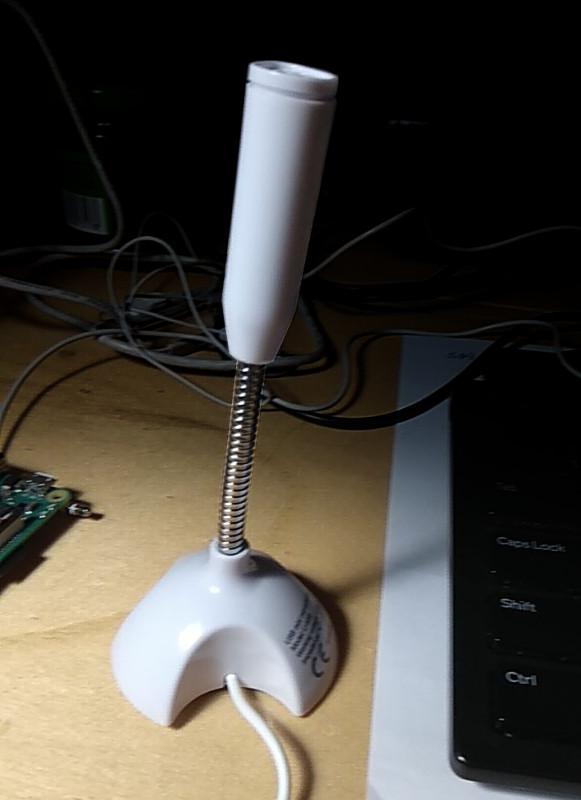
Before using it I also tried a small USB audio card but I had a lot of conflicts being raised by pyaudio, the library I used to handle the recording and playing of audio files in python.
For the audio output I connected a small speaker directly to the RPi audio output jack. The volume is a little low, but it gets the work done.
Final assembly
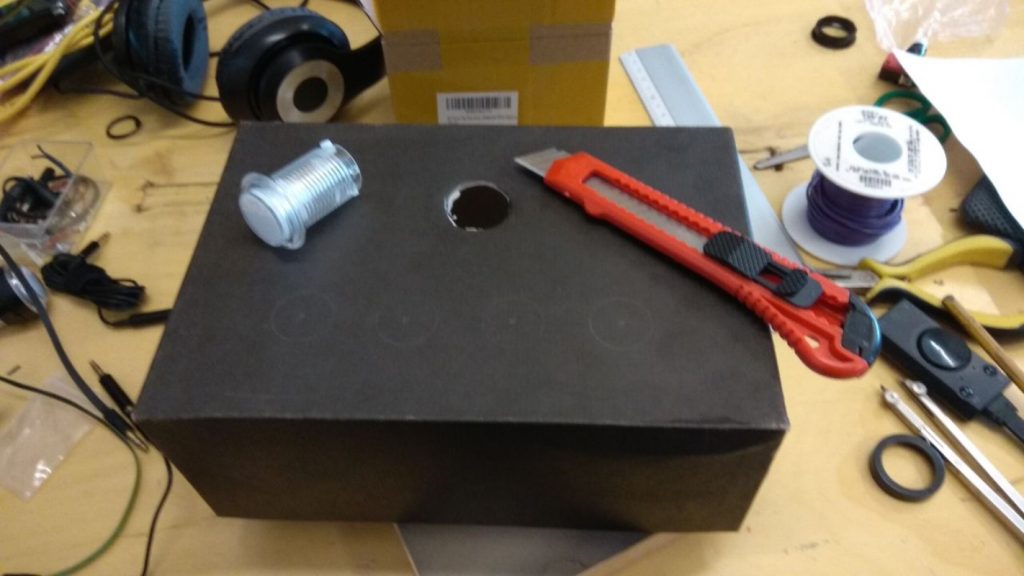
Once the PCBs and all the components arrived it was time to replace the TUI with a Button UI. I used the handy gpiozero library to handle button press and leds. For the external case I used a shoe box to which I made holes for the buttons and speaker.
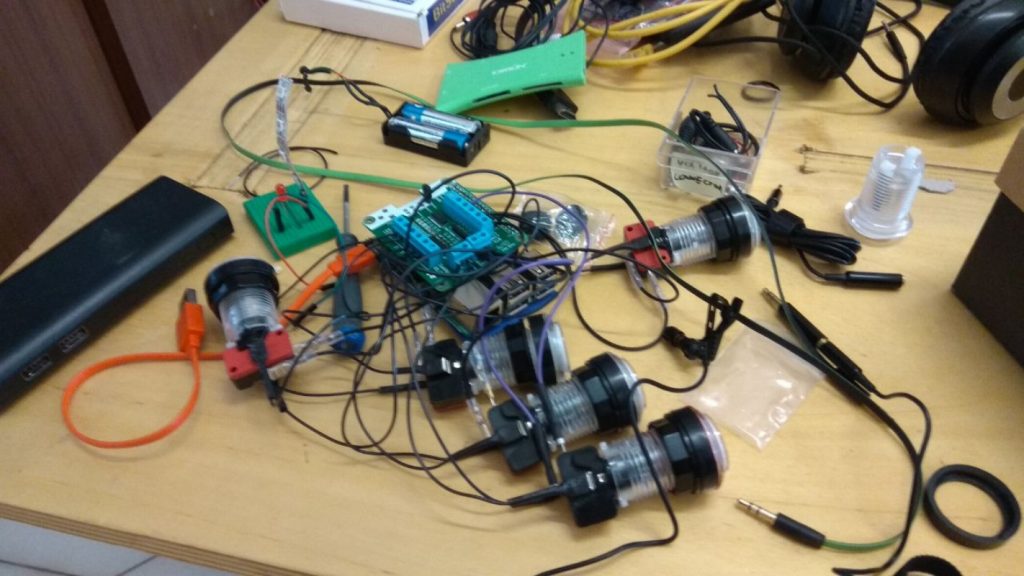
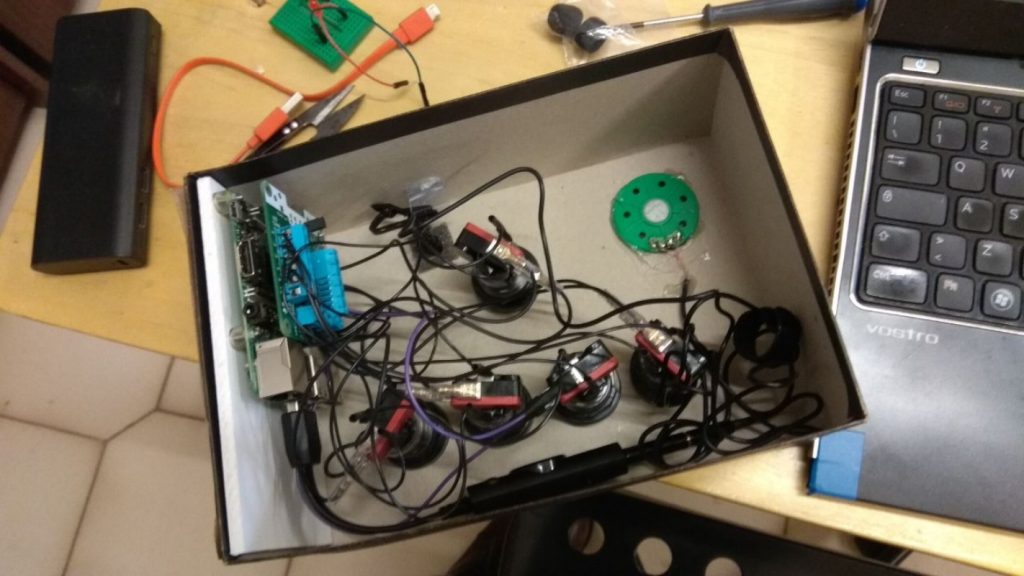
Once everything was set and tested I disassembled and packed all the components inside the box, wrapped the whole thing as a gift to prepare it for the best part.
XMAS
I gave the box as a present to my daughter to be opened on Christmas eve without telling her what the purpose of all those parts were. The next morning we spent a couple of hours putting it all together, so she discovered the purpose of the device, its final shape and got a glimpse of the internal functionality during the process.
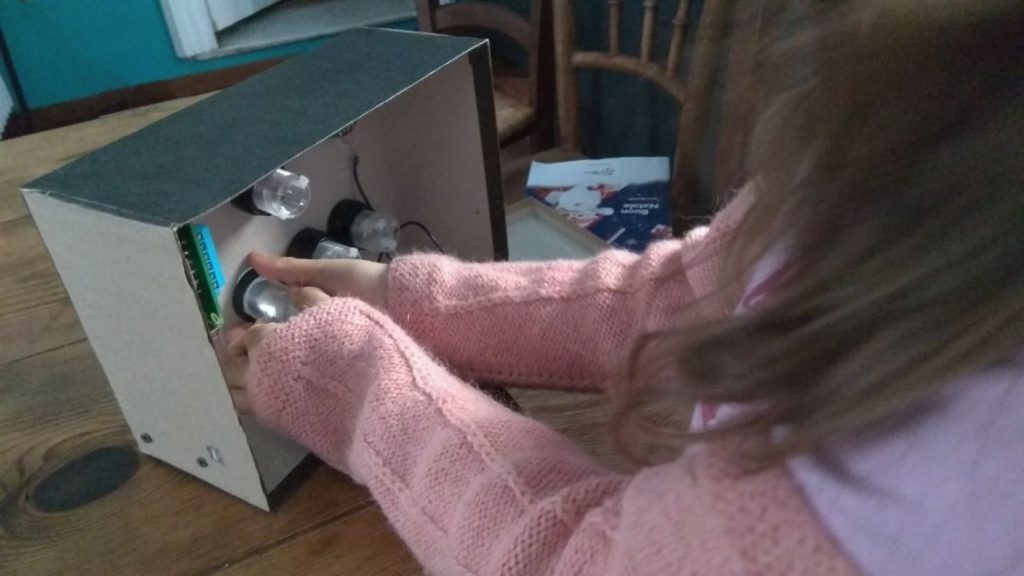
When it was done my kid liked it way more than I could ever expect. What I conceived as an utilitary tool to keep us connected when I wasn’t close soon became a part of a game of exchanging messages about every little action in the everyday routine, even when we are just a few meters away 😅.
So I’m quite happy with the result. Not only did this object help strengthen our relationship, it ended up being a cool way to transmit the hacker-maker values and habits to a young mind.
I hope some of you find this useful and if you try to build this at home I would love to know how it went for you, please share your experience in our forum using the offtopic tag.
And above all, have a great starting of the year!